
As an Amazon Associate I earn from qualifying purchases. This post may contain affiliate links. Read our disclosure.
Quick answer: to ship your first 100 orders you need a 4×6 thermal label printer, 500 direct thermal labels, a digital shipping scale, mailers and two or three box sizes, tape and a dispenser, and void fill. Everything else can wait until you know your volumes.
Our top picks

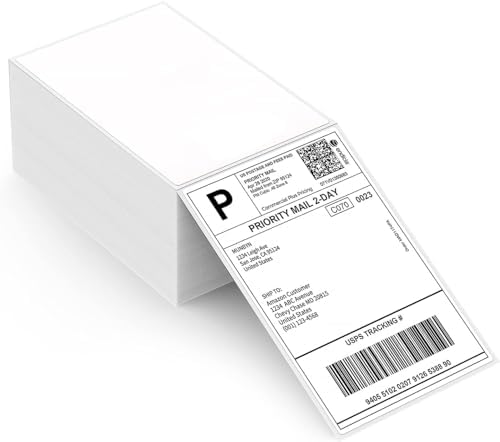

Who this kit is for
This list is for sellers who pack and ship their own orders from home or a small room: Walmart Marketplace, Amazon merchant-fulfilled, Temu, eBay or your own store. Our team runs day-to-day operations for 30+ Walmart seller accounts, and this is the setup we give a new seller who is about to ship their first orders.
It covers the first 100 orders. After that, your own order data should decide what you buy next.
The starter checklist
| Item | Starting quantity | Why you need it | Guide |
|---|---|---|---|
| 4×6 thermal label printer | 1 | No ink or toner; prints a label in seconds | Jadens review |
| 4×6 direct thermal labels | 500 | 100 orders plus test prints, reprints and return labels | Roll vs fanfold |
| Digital shipping scale (0.1 oz readings) | 1 | Postage is priced by weight; guessing leads to overpaying or carrier adjustments | Shipping scales |
| Poly mailers | 100 in your main size, 50 in a second size | Cheapest and lightest option for soft goods | Mailer sizes |
| Corrugated boxes | 25 to 50 each in 2 or 3 sizes | Rigid, fragile or awkward items | Mailers vs boxes |
| Packing tape and a dispenser | 3 rolls, 1 dispenser | Seals boxes faster and neater than tearing tape by hand | Tape guide |
| Kraft paper or bubble wrap | 1 roll | Stops items moving inside the box | Void fill |
The quantities are starting points. If most of your products are soft goods, shift spending from boxes to mailers. If you sell glass, ceramics or electronics, do the opposite.
How to choose each item
Label printer
Buy a 4×6 direct thermal printer. It uses heat instead of ink, so the only running cost is labels. Before you buy, check that it works with your computer (Windows or Mac), prints the 4×6 labels your marketplace produces, and accepts both rolls and fanfold stacks. USB is the most reliable connection; Bluetooth helps if you print from a laptop or phone away from the desk. Compare five models in our best 4×6 thermal label printers guide.
Not sure which label type you need? Read direct thermal vs thermal transfer. Bookmark the troubleshooting guide for your first blank or misaligned label.
Labels
Direct thermal labels suit shipping because they only need to last until the parcel is delivered. Fanfold stacks sit behind the printer and load easily; rolls need a holder but take less desk space. Starting with 500 avoids tying up cash. See roll vs fanfold.
Shipping scale
Pick a scale that reads in 0.1 oz steps, has a tare button and handles your heaviest parcel with room to spare. A hold function or detachable display helps when a box covers the screen. Weigh the packed parcel, not just the product: the mailer, box and void fill all count. See shipping scales for small sellers.
Mailers and boxes
Use the smallest packaging that protects the item. Carriers charge large, light parcels by dimensional weight, so an oversized box can cost more to ship than a heavier small one. Read dimensional weight in 2026 and, if you ship with USPS, Ground Advantage cubic pricing before you buy boxes in bulk.
Tape and void fill
Use 2-inch packing tape (sold as 1.88 inches) and seal boxes in an H pattern: one strip along the centre seam and one across each edge. Fill gaps so nothing moves when you shake the box. Kraft paper works for most items; bubble wrap is better for fragile ones. See the tape guide and void fill options.
Set up a simple packing station
You do not need a dedicated room. One table is enough if you lay it out in the order you work:
- Pick: products on shelves within arm’s reach.
- Pack: mailers, boxes and void fill on one side of the table.
- Weigh: scale in the middle, where every packed parcel goes down.
- Label: printer at the far end, loaded and connected before you start.
- Stage: a bin on the floor for finished parcels waiting for pickup or drop-off.
Working in one direction cuts walking and makes it harder to put the wrong label on the wrong parcel. More layout ideas are in the home office setup guide.
What to skip for now
- Custom printed boxes and branded tissue. Wait until you know which sizes you actually use.
- A second label printer. One is enough until labels pile up faster than one person can pack.
- Bulk packs of every box size. Buy small packs, then reorder the sizes you run out of.
- Paid shipping software. Walmart, Amazon and eBay all let you buy and print labels inside the seller dashboard.
Add later
- A barcode scanner once you prep FBA or WFS inventory: scanner guide. Read FBA prep in 2026 or the WFS prep checklist before your first shipment.
- A light box for listing photos: product photography.
- A second monitor and a better chair: home office setup.
First-100-orders rules
- Weigh and measure every parcel; do not guess.
- Print labels at 100% scale on 4×6. See Ship with Walmart labels.
- Write one packing rule per product and stick to it.
- Hand parcels to the carrier by the ship-by date. Late handover drags down on-time delivery scores, and marketplaces act on those scores.
- Track damage and returns by packaging type, then adjust.
- Reorder labels and mailers when about a quarter of your stock is left, not when it runs out.
The core kit
Packaging to start with


Common questions
Do I need shipping software for my first 100 orders?
Usually not. Each marketplace lets you buy and print labels from its own dashboard. Software is worth testing once you sell on several channels and want one place to print everything.
Can I use a regular printer instead of a thermal one?
Yes, for a handful of orders, using sheet labels or paper and tape. Once you ship daily, a thermal printer is faster and has no ink to replace.
How much should I spend up front?
Spend on the label printer and scale, which you will use for years. Keep packaging purchases small until your first 100 orders show which sizes you really need. Use the links above to check current prices on Amazon.